
How to Do Moisture Mapping Right (Water Damage Jobs)
Restoration
3 min read
Share

Moisture mapping has come a long way from jotting notes in a notepad and snapping a few photos with your phone. Today, with tools like magicplan and a Bluetooth‑enabled Tramex meter, you can walk a property, capture real readings, and generate a complete moisture report — all before you leave the job site.
This isn’t about bells and whistles. It’s about saving time, protecting yourself with solid documentation, and making sure everyone on the job — from your estimator to the adjuster — sees exactly what you saw.
Here’s a practical guide to moisture mapping in the field.
Step 1: Outline the Affected Area
Open the magicplan app and start a new project. Use the “Affected Area” tool to draw the footprint of where the water hit → floors, walls, ceilings. You can be as detailed as needed.
📌Pro tip - Use color coding. Contractors often go with:
🔵 Blue for general moisture spread
🔴 Red for source areas (e.g., around a burst pipe or entry point)
You can also drop in timestamped photos right into the floor plan. That gives you visual documentation tied to the exact location and eliminates the risk of mismatching images later.
Step 2: Drop Your Moisture Readings In Real‑Time
If you're using a Tramex ME5 or CMEX5, magicplan connects directly via Bluetooth.
Here is how:
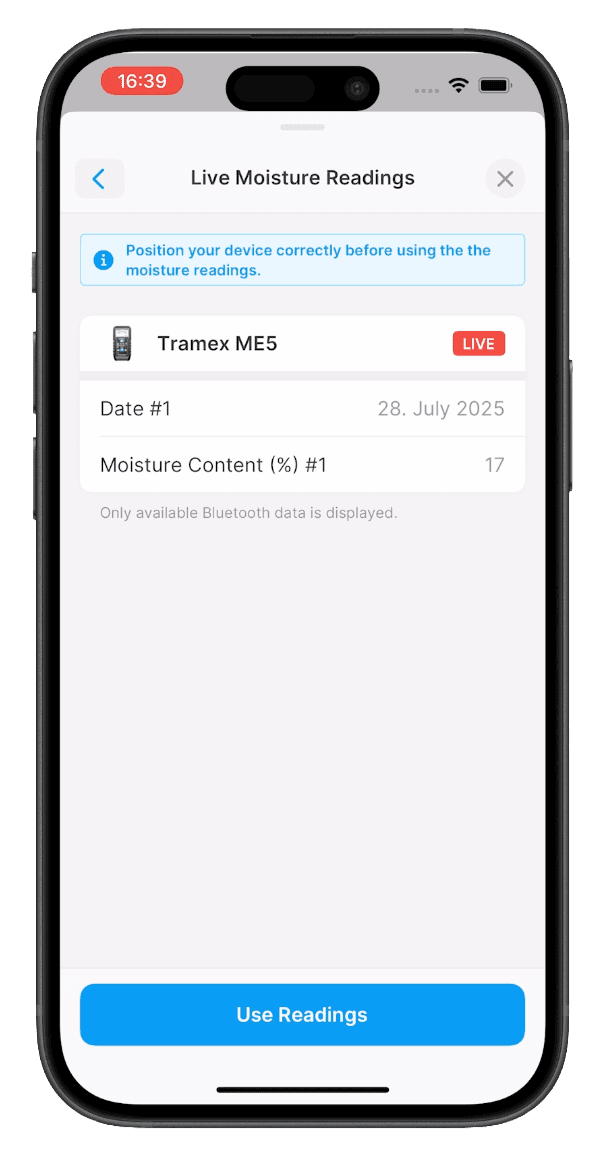
🔹After opening a project in the magicplan app, you have to add a moisture meter from the object library. Now open its info section and tap “Use Readings”
🔹Your meter’s live reading will sync straight into the floor plan. No extra steps.
🔹Take a photo of the meter screen while you’re measuring. That image gets saved alongside the data and location.
Now your readings aren’t just numbers, they’re backed by visual proof, taken on site, and locked to a map of the room.
For full instructions on connecting and using a Tramex meter with magicplan, see the Help Center article → How to Connect and Use a Tramex Moisture Meter in magicplan.
Step 3: Export a Complete Moisture Report
Once you're done:
Export a full PDF report that includes your floor plan, meter readings, photos, and notes.
No double entry. No spreadsheets. No handwriting to decipher.
Send it straight to your GC, adjuster, or back office before you even leave the property.
📌This is gold when an adjuster questions your reading two weeks later 🏆you've got a timestamped, geo‑tagged record with photo backup.
Why This Process Works
✅ Saves Time
One app. One walk‑through → Done!
You’re not repeating work when you get back to the truck or worse, back at the office.
✅ Defensible Documentation
If an adjuster pushes back, you’re not scrambling.
You’ve got the meter photo, the map, and the time stamp, no room for guesswork.
✅ Everyone on the Same PageProject managers, estimators, techs, and adjusters can all see the same thing: what was wet, how wet it was, and where it happened.
Use It On Any Type of Loss
Whether you're chasing Category 3 water in a basement or dealing with wet drywall after a supply‑line burst, this workflow keeps your process sharp and your documentation tight.
📌Check out our tips on how to Choose the Right Moisture Meter for Restoration Work.
Final Thought
You don’t need to overhaul your entire workflow. But adding magicplan into your moisture mapping routine can cut hours off your documentation time, while helping you create better, clearer, and more defensible reports.
✅It’s not about being flashy. It’s about working smarter in the field and magicplan helps with that
Learn more:
📘Overview of all external devices you can integrate with magicplan → Restoration: Compatible External Devices.


