How to Start a Content Restoration Service After Disaster & CAT Events
Restoration
5 min read

Share

In the aftermath of a disaster, such as a storm, fire or flood, the road to recovery can be long and arduous. Alongside the physical and emotional challenges, individuals often find themselves grappling with dirty and damaged personal belongings. But they don’t have to cope with this ordeal alone. Content restoration specialists can step in and help, by rescuing and renewing their affected possessions. If you are interested in offering this type of service as part of your restoration business, be sure to read the helpful information and tips below.
Why You Should Consider Offering Content Restoration
Content restoration is not only a lucrative specialty, it’s also a deeply rewarding endeavor. Personal belongings are often irreplaceable, and some hold sentimental value beyond measure. By offering content restoration services, you can play a vital role in alleviating the emotional distress of disaster-affected individuals. Additionally, diversifying your disaster restoration company by adding content restoration can set you apart from competitors, enhancing your reputation as a comprehensive, committed and caring service provider.
What You Need in Order to Become a Content Restoration Pro
Before embarking on your journey as a content restoration professional, there are certain prerequisites to fulfill:
Knowledge: Comprehensive knowledge of the types of disasters and their effects on different materials is crucial. Understanding the intricacies of different belongings, such as furniture, textiles, electronics, and artwork, will guide your restoration efforts effectively.
Training: Enroll in specialized training programs that offer insights into content restoration techniques and safety protocols. Staying up-to-date with the latest advancements in the field is essential for delivering quality service.
Space: You’ll need your own climate-controlled facility, where you can store and renew any damaged items that you remove temporarily from jobsites.
Staffing: Hire qualified, enthusiastic individuals and provide appropriate training.
Resources: Equipping yourself with the right tools is paramount. Invest in state-of-the-art cleaning, drying, and restoration equipment to ensure effective restoration without causing further damage. You will also need plenty of boxes and packing materials on hand, as well as adequate trucks, dollies, and other moving devices.
Things to Do Before You Begin Any Restoration Project
When you first arrive at a jobsite, be sure to do the following:
Ensure Safe Working Conditions: Confirm that the site is safe for you and your crew. Identify potential hazards and implement appropriate safety measures.
Find Out What to Prioritize: Have the property owner point out items that they want you to prioritize (i.e., contents that have high monetary or sentimental value).
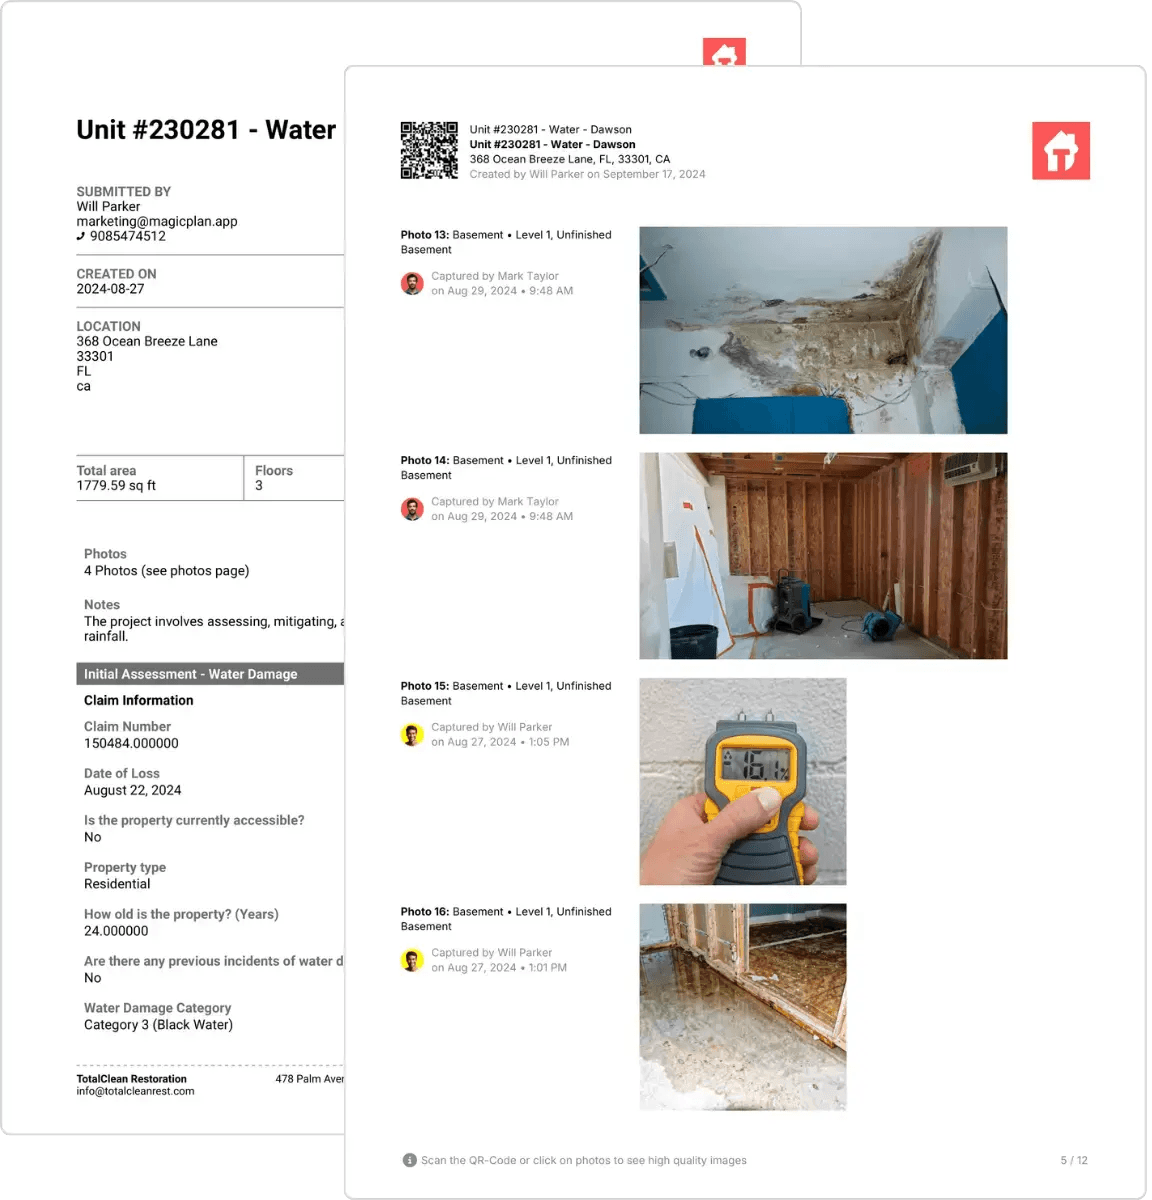
Document the Scene: Capture the initial locations and conditions of damaged items.
The Best Way to Document Belongings
Thorough documentation is an essential step in the content restoration process. Here's how to approach it:
1. Sketch with a Floor Plan App
A floor plan app like magicplan can be immensely helpful for content restoration. With this type of app loaded on your mobile device, you can create a sketch of a property’s interior quickly and easily. Then you can enhance your sketch by inserting app-included objects (small line drawings) to visualize where damaged furniture and appliances are located. A good app will also let you create custom objects for your sketch, so you can document other types of damaged items as well.
Your completed sketch will serve as a comprehensive overview of the property's contents before restoration work begins. This will be particularly handy if you “pack out” (remove) contents for restoration work.
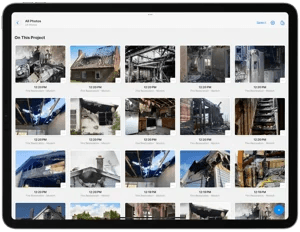
2. Take a Lot of Photos
Capture high-resolution images of each item from multiple angles, capturing details and pre-existing conditions. This photo-documentation process is important for the following reasons:
It’s often necessary for claim review and settlement. Visual evidence is the cornerstone of insurance claim approval.
It plays a critical role in getting a homeowner’s approval. Photo documentation clarifies and supplements written information, so the homeowner can understand and agree to all work that needs to be done.
It’s a good risk-management practice that helps protect your business. If a homeowner raises questions or concerns after work is completed, you can use visuals to repaint the picture of the initial damage and to prove you met your contractual obligations.
LEARN MORE: 9 Best Practices for Photo Documentation In Complex Restoration Work
3. Attach Each Photo to Your Floor Plan Sketch
Then insert an annotation describing the photographed item in detail.
4. Back Up Your Sketch and Photos
Store all of your documentation electronically in a secure location, preferably on a cloud server. (A good floor plan app will give you the option of cloud storage.) This ensures that the information remains accessible even if physical records are lost.
5. Create a Photo Report
Your floor plan app should allow you to create a photo and video report this seamlessly. And you can use your report as a basis for developing your work contract.
Seven Key Steps That Must Be Completed After Initial Documentation
Categorizing: Group each room’s damaged items into categories. This will make it easier to locate and reference items during the restoration process. Use well-defined room and category labels if you are “packing out” (removing) possessions and temporarily taking those to your own facility for restoration work.
Staging: If you decide to use a clean-in-place approach (as opposed to removing possessions from the property), you’ll need to set up a containment area onsite. This is where you will clean and restore damaged items.
Cleaning: Utilize appropriate cleaning techniques for different materials. Delicate items might require manual cleaning, while others can undergo mechanical or chemical cleaning processes.
Drying: Properly dry items to prevent mold growth and further deterioration. Use specialized drying chambers and dehumidifiers to maintain optimal conditions.
Restoring: Employ specialized techniques for restoring items to their pre-damage state. This might involve repairing, reassembling, or repainting, depending on the nature of the items.
Checking: Conduct rigorous quality-control checks to ensure that all items are thoroughly restored and safe for use. Any items that don't meet restoration standards should be reprocessed.
Returning: Carefully pack up all items you restored at your facility and transport those back to the jobsite. Unpack the items and position everything back in place, using your floor plan sketch as a handy guide.
Conclusion
Content restoration is a rewarding endeavor that blends technical expertise with emotional support. By offering this important service, you will contribute significantly to the healing process that comes after disasters. With the right knowledge, training and resources – and a meticulous approach to restoration – you can help individuals not only regain use of their belongings, but also rebuild their lives.


