Stop Scope Creep Before It Starts: The Power of Restoration Documentation
Restoration
5 min read
Most scope problems don't start when someone disputes an invoice. They start on site, when critical details aren't documented. A damaged wall isn't photographed, pre-existing damage isn't recorded, or an important observation never makes it into the job file. Weeks later, the office is left trying to reconstruct the loss from disconnected photos.
Good restoration documentation creates a complete record of the property before, during, and after the work. It gives estimators the context they need, helps explain the scope to customers and carriers, and reduces disputes before they happen.
The goal isn't to take more photos, it's to capture the right information, in context, while the evidence is still in front of the crew.
What is scope creep in a restoration project?
Scope creep happens when the work gradually expands beyond what was originally identified, communicated or approved.
On a restoration job, that can happen when:
Damage and scope changes aren't documented, leading to missed work or disputes later.
Teams have different understandings of the loss, causing inconsistencies between mitigation, reconstruction, and the office.
The property's original condition isn't clearly recorded, making it difficult to distinguish pre-existing damage from new damage or justify the completed work.
Not every change is avoidable. Restoration work is full of unknowns, especially when moisture, mold or fire damage is hidden behind finished materials.
The problem is not that the scope changes. The problem is that the reason for the change cannot be clearly demonstrated.
A documented baseline makes those changes visible. Without it, additional work can look like an unsupported addition to the bill.
Why the first site visit matters most
Nobody understands the loss better than the crew standing in it.
They can see the water line before it disappears. They can identify where the wall covering is separating. They can hear a compromised floor move underfoot. They can distinguish current damage from an old stain or previous repair.
Once the crew leaves, much of that context begins to disappear.
The property changes as materials are removed and drying begins. The technician moves on to another job. The estimator receives the file without ever seeing the original conditions. The reconstruction team may arrive weeks later.
That is why the field record matters.
When the job is captured properly on the first visit, the office can build from what actually happened instead of piecing the property back together secondhand. The positioning behind this workflow is deliberately field-first: the crew’s knowledge should become the record the rest of the job is built on, not a collection of clues somebody else has to decode.
What should be included in a visual restoration file?
A useful restoration file should tell the story of the loss in a logical order.
It should show:
The property's condition when the crew arrived.
Where the damage was located and how extensive it was.
How the project evolved as work progressed.
Organized documentation that's ready to share, with sensitive information redacted when needed.
Current water-damage documentation guidance similarly emphasizes capturing the source, affected areas, damaged materials and initial conditions before remediation changes the scene.
Here is how to build that record using photos, videos and 360° images.
1. Start with the exterior
Before going inside, capture a clear exterior photo of the property.
This gives the documentation package an immediate point of reference. It confirms which property was documented and makes the final report easier to understand for anyone who was not on site.
For larger or multi-building properties, exterior photos can also help distinguish one structure or entrance from another.
Do this before focusing on detailed damage. Think of the exterior photo as the cover of the job file.
2. Photograph the damage from three distances
A single close-up rarely gives the office enough context.
For each important area, capture three types of images:
The overview photo
Stand farther back and show the entire room or affected section. This establishes where the damage is located.
The mid-range photo
Move closer and show the affected material together with nearby fixtures, walls or flooring.
The detail photo
Capture the stain, separation, crack, mold-like growth or damaged material up close.
This sequence answers three different questions:
Which room are we looking at?
Where is the damage within that room?
What exactly requires attention?
The transcript demonstrates this process by photographing the water damage first from farther away, then closer, and finally at detail level. The images remain attached to the same project rather than being left as an unstructured camera roll.
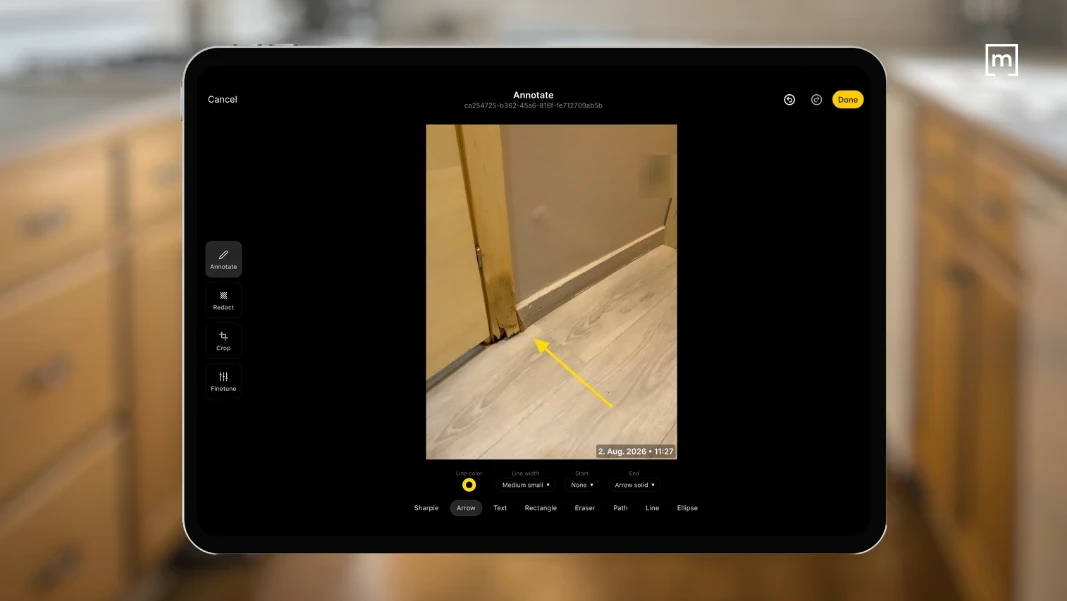
3. Add markups while the condition is still fresh
A photo may be obvious to the technician who took it, but far less obvious to an estimator reviewing it several days later.
Use arrows, highlights or other annotations to point directly to:
The visible edge of the affected area.
A section of detached wall material.
A suspected point of origin.
An area requiring further inspection.
Damage that is difficult to see in the unedited image.
Annotations reduce ambiguity. They help the next person understand what the technician intended to document without calling the field for an explanation.
This is especially valuable when the visible damage is subtle or when multiple conditions appear in the same photo.
4. Record a short walkthrough video
Photos freeze individual moments. A video helps connect them.
A short narrated walkthrough can explain:
Where the visible damage begins.
How it appears to have travelled.
Which adjacent materials may be affected.
Whether the rest of the room appears unaffected.
The narration does not need to sound polished. It needs to be specific.
For example:
“The visible wall damage begins behind the bathtub and continues toward the corner. The floor may also be affected, but that still needs to be verified. No additional visible damage was observed on the opposite wall.”
That 30-second explanation may save several messages between the office and the crew later.
In magicplan, a video of up to five minutes can be added directly to the project as additional visual documentation.
5. Use a 360° image to preserve the room in context
Standard photos are excellent for individual details. A 360° image preserves the spatial relationship between those details.
It allows someone reviewing the file to look around the room, zoom in and understand how the affected wall connects to the bathtub, floor, doorway and adjacent surfaces.
This can be useful when:
Complex layouts or multi-area damage: Ideal when a room's geometry is hard to explain with standard photos or when damage spreads across several connected surfaces.
Virtual site revisits: Allows clients, estimators, or adjusters to inspect the full space remotely without needing another on-site trip.
Pre-demolition & reconstruction context: Preserves a complete 360° record of the original room before teardown, giving rebuilding teams crucial context later on.
A compatible Ricoh or Insta360 camera can be paired with magicplan. The photo can then be captured from the mobile device without touching the camera, reviewed and saved to the project. Markups and redactions can also be added to the panorama.
A 360° image should not replace detailed photos. It works best as the connective tissue between them.
6. Redact information before sharing the file
Restoration documentation can unintentionally capture sensitive information, including:
Faces.
Family photographs.
Names or addresses on documents.
Computer screens.
Financial or medical information.
Vehicle license plates.
Personal belongings unrelated to the loss.
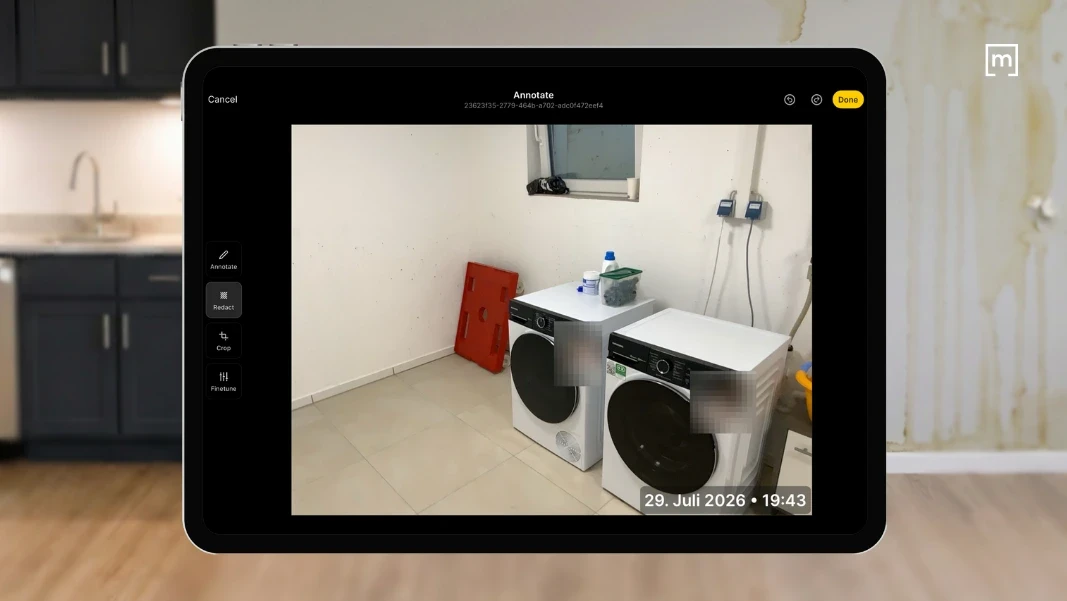
Before sharing documentation with a client, carrier or third party, review the file and obscure information that does not belong in the report.
Redaction protects the property owner while keeping the relevant damage visible. Both standard photos and 360° images can be redacted as part of the visual documentation workflow shown in the transcript.
7. Keep everything connected to one project
Forty photos in a phone gallery are not the same as a usable restoration file.
The office should not have to guess:
Which property the photos belong to.
Which room is shown.
Which image came first.
What the technician wanted to highlight.
Whether a video or panorama exists somewhere else.
Which version was shared with the client.
The documentation should live together as a single project record.
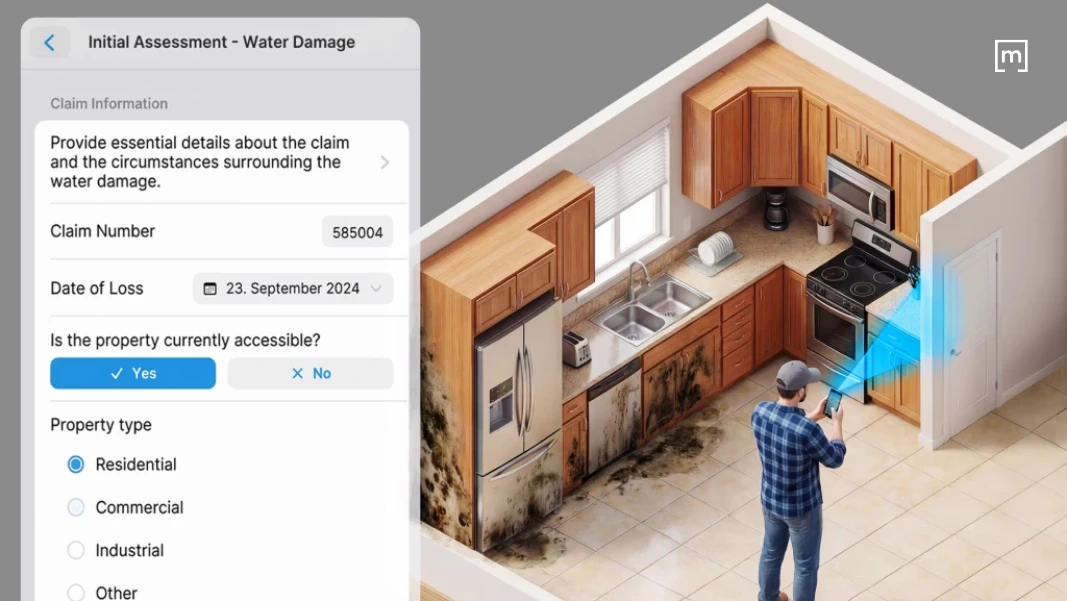
This does not mean every restoration company needs one system for scheduling, accounting, customer management and documentation. In fact, presenting a field-documentation tool as an “all-in-one platform” can create the wrong expectation.
The more useful role is simpler: create a reliable field record that the rest of the team can actually use. The positioning document describes this as the place where the field job is captured and carried forward, rather than another pile of disconnected information.
8. Share the documentation in a format people can navigate
The final file should not create more work for the person receiving it.
Depending on the project and recipient, the visual documentation can be shared as:
An interactive web gallery
A web gallery allows colleagues, clients and other stakeholders to review photos, open videos and interact with the documentation in a browser.
This works well when the recipient needs a quick, accessible overview without downloading a large file.
A PDF report
A PDF creates a more traditional report that can be stored, attached to a claim or shared internally.
The report can include the project information, photos and annotations captured on site.
A 360° tour
When multiple 360° images are attached, they can be published as a tour. Each documented room appears as an interactive panorama that the viewer can open and inspect.
The transcript demonstrates all three export options: web gallery, PDF and 360° tour.
How better documentation prevents scope creep
A strong visual record does not stop hidden damage from appearing. It does something more practical: it gives the company a clear starting point from which every change can be explained.
When additional work becomes necessary, the team can show:
The original property condition.
The visible damage identified during the first visit.
What was discovered after materials were opened.
Why the scope changed.
Which work belonged to the original loss.
Which request or condition was outside the original scope.
That clarity protects more than the invoice.
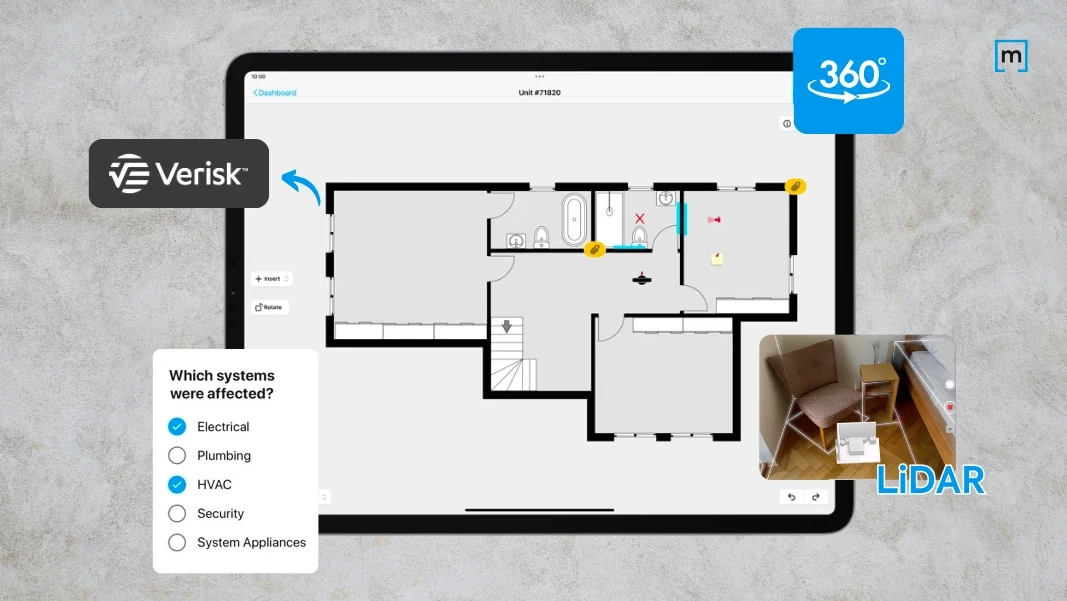
It improves the handoff from the field to the office. It gives estimators evidence they can use instead of a photo pile they have to interpret. It helps reconstruction understand what mitigation found. And it reduces the number of times the owner has to personally step in and explain what happened.
In other words, the company stops chasing missing context after the fact.
Documentation should help get the job paid, not just make the report look good
Great documentation isn't about photo volume, it's about clarity for those who weren't on-site.
When estimators, project managers, and rebuild teams can understand original conditions and decisions without calling the technician, the job is done. The right process ensures field knowledge doesn't disappear when the crew leaves.
Capture it once, while the evidence is still there. Keep it organized. Make it usable for everyone who touches the job next.
Take a look at this Article about How to Train New Restoration Techs to Scope Water-Damaged Sites Like Pros (4 Strategies to Try)
Share

Silvia Corvi
Community Manager