The Photo Documentation Playbook: How to Capture What Adjusters Actually Need
Restauration
4 min read

Share

Bernd Wolfram
CPO
If you run a restoration company, you already know that photos can make or break a job file. But here’s the truth most people won’t say out loud: taking photos is easy — creating USEFUL photo documentation is not. Every crew member has a phone. Every job folder has hundreds of images. Yet adjusters still ask for more proof, estimators still chase missing details, and clients still question what happened in their home.
The problem isn’t a lack of photos. It’s a lack of clarity, consistency and context. Great photo documentation isn’t about volume — it’s about building a visual record that tells the full story of the job from start to finish. Let’s break down what that actually looks like, and how your team can get there without adding more work to their day.
Why “A Bunch of Pictures” Isn’t Enough
Think back to the old days — printed scope sheets, pen-smeared notes on truck dashboards, estimators trying to decipher which photo went with which room. Even now, with smartphones everywhere, the same problems show up in digital form:
Photos saved out of order
Images with no labels or context
Random angles that don’t show the full loss
Missing “before” shots
No proof of drying progress or completed repairs
Estimators digging through 300+ photos trying to match them to line items
When documentation is scattered, you lose time, credibility, and leverage. Adjusters ask more questions. The approval process drags on. Your team spends hours re-explaining what happened.
A great photo record eliminates all of that.
What “Great” Photo Documentation Actually Looks Like
Poor vs. Excellent Photo Documentation: A Quick Comparison
A Simple Framework Your Crew Can Start Following Tomorrow
You don’t need a complicated “standard operating procedure.” You just need a repeatable process your team can execute on every job. So, here’s a straightforward, three-phase workflow your team can begin using right away:
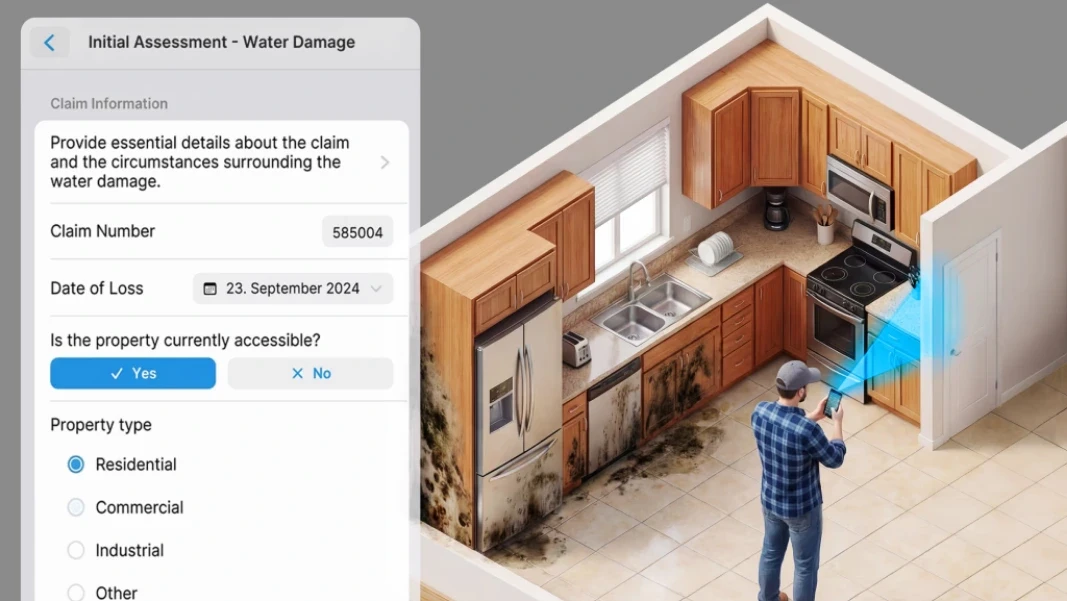
1. BEFORE WORK BEGINS: CAPTURE THE INITIAL CONDITION
Your goal here is to show the full extent of the loss.
Take:
Wide shots of every affected room
Medium shots of each affected area
Close-ups of materials, moisture readings, and damage details
Photos of pre-existing conditions
Photos of contents and anything that may be moved or protected
Why it matters: This protects you from liability, supports your scope, and gives adjusters a clear baseline.
2. DURING THE JOB: DOCUMENT PROGRESS AND PROCESS
This is where most crews fall short, they get busy and forget.
Take:
Photos of demolition in progress
Photos of equipment placement
Daily drying progress
Moisture meter readings
Any unexpected findings (hidden mold, structural issues, etc.)
Why it matters: These photos justify your line items, especially when supplements are needed.
3. AFTER COMPLETION: SHOW THE FINAL CONDITION
This is your proof of performance.
Take:
Wide shots of every room after work is complete
Close-ups of repairs, cleaning, and final moisture readings
Photos showing the home restored to pre-loss condition
Why it matters: This closes the loop and reduces client callbacks.
How Digital Photo Tags Make This Process Effortless
You can absolutely train your team to follow the framework above using checklists and discipline. But digital tools can remove the friction, especially when they automatically organize photos for you.
This is where photo tags in magicplan photo report software come in.
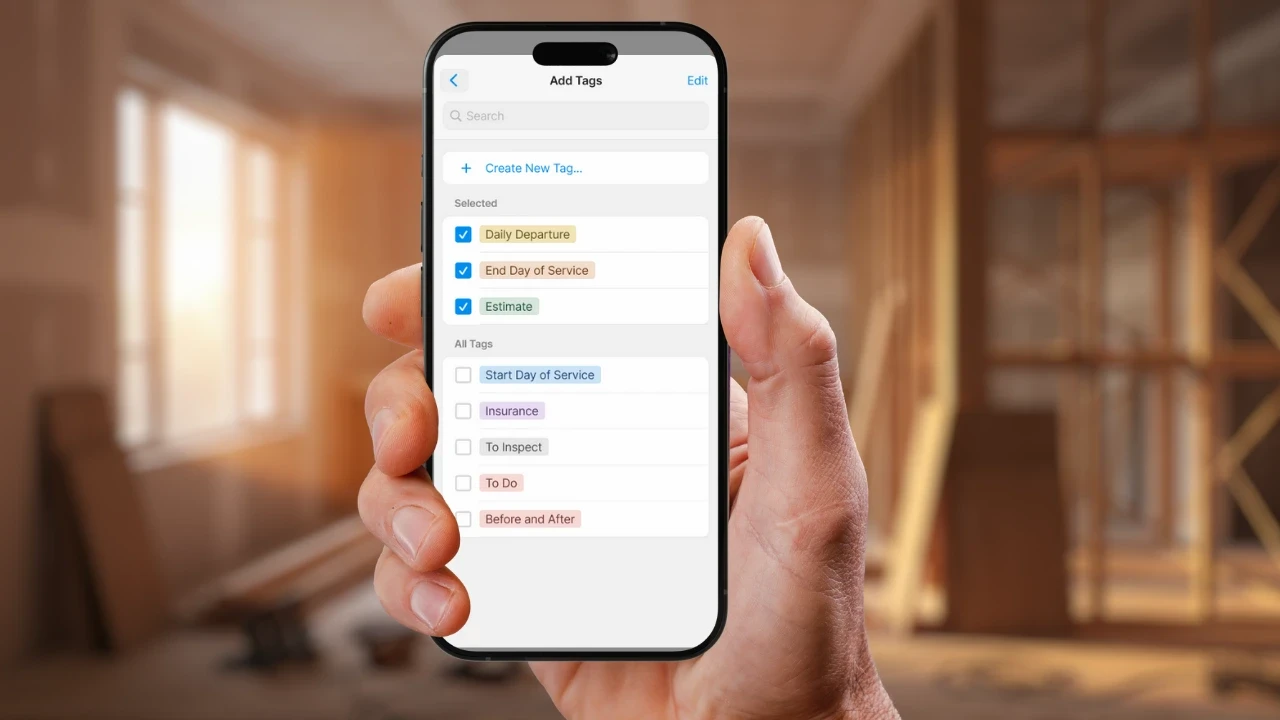
Instead of crews taking photos on their phones and uploading them later (or forgetting to upload them at all), magicplan lets them capture everything inside the project itself.
Here’s what that means for you:
Photos Are Automatically Tied to the Right Room
No more guessing where a photo belongs. If the technician is standing in the kitchen, the photo is tagged to the kitchen.Photos Are Linked to the Correct Task or Line Item
For example: If they’re documenting baseboard removal, the photo is tied to that specific scope item.Phase Tags Add Instant Clarity
“Before,” “During” and “After” tags make the job story obvious at a glance.Everything Lives in One Place
Sketches, notes, measurements, and photos all stay inside the same project — no re-uploading, renaming, or sorting.Cleaner ESX Exports for Estimators
When photos are tagged properly, your ESX export becomes a visual roadmap. Estimators can trace every line item back to a photo instantly.
This is the digital version of the old “checkbox walkthrough” except now your team can complete it on their phone, add line items directly, and walk away with a fully organized job file without extra steps
Main Takeaway: You Don’t Need More Photos, You Need Better-Organized Images
Most restoration companies already take plenty of pictures. The problem is that they’re soften scattered, unlabeled, and disconnected from the scope.
But when photos are nearly organized "by room, by task, by phase" you end up with stronger claims documentation.
That’s easy to do with magicplan restoration software because it makes visual documentation automatic. It turns scattered pictures into structured, proper documentation. And so everything becomes easier:
Effortless integration with Xactimate® software requirements
Less back-and-forth with adjusters
Fewer adjuster questions
Faster estimate approvals
More accurate estimates
Better protection for your business
Try it out for yourself on your very next job, and discover how better photo documentation can enhance your operation.
FOCUSED ON IMPROVING YOUR BOTTOM LINE?


