LiDAR Floor Plans: How to Scan Complex Open Spaces Faster

Restauration

3 min read

Open-concept properties can make restoration sketching harder than it needs to be.

The kitchen flows into the living room. A staircase breaks up the space. There's a small closet tucked into one corner. And your technician still needs to leave the property with a floor plan the office can actually use.

Instead of trying to draw the entire layout manually, a LiDAR floor plan lets you capture the space while walking through it, then clean up the details afterward.

The goal isn't to create a perfect scan in one pass. It's to capture the property quickly while you're standing in it and turn that field information into a usable job record.

Steps to Create a LiDAR Floor Plan for Complex Open Spaces

1. Scan Complex Open Spaces in Sections

An open-concept room doesn't have to be captured as one enormous scan.

In the example workflow, the connected kitchen and living area are scanned separately first. LiDAR Auto-Scan captures the main elements of each room, with the option to include furniture and appliances.

This makes complicated spaces easier to handle.

Instead of worrying about getting the entire floor perfect at once, focus on capturing one logical section completely, save it, and move to the next.

2. Capture the Space First, Fix Details Second

Real properties aren't clean rectangles.

Walls may be partially hidden. Corners can be difficult to reach. Furniture gets in the way. Staircases interrupt the scan.

That doesn't mean the technician needs to stop and start over.

Once a room has been captured, walls, corners, and other room details can be adjusted afterward. Even dotted lines in the scan don't necessarily mean the room needs to be rescanned.

That changes the field workflow considerably: capture first, refine second.

The technician can keep moving through the property instead of spending extra time trying to make every individual scan perfect.

3. Don't Let Stairs or Awkward Features Stop the Scan

Staircases are a good example of why restoration sketches need to stay editable.

Rather than interrupting the scanning process when you reach the stairs, continue capturing the surrounding area. Once the scan is complete, the staircase can be resized and repositioned directly on the floor plan.

The same principle applies to other objects.

Capture enough information in the field to understand the layout, then make small adjustments where they're needed.

4. Join Separate Scans Into One Open-Concept Floor Plan

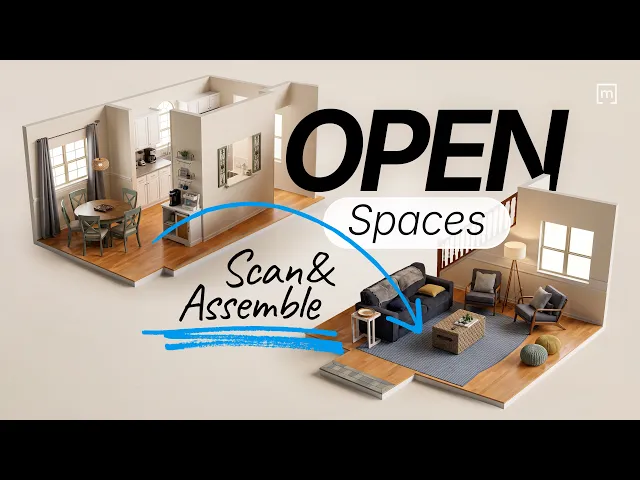
Once the kitchen and adjoining space have been scanned, they can be assembled into the open layout that exists in the property.

In the demonstrated workflow, corners are added to the shared wall and the wall section between them is removed. The adjoining wall is then adjusted to align the two areas correctly.

This is particularly useful for properties where spaces function as separate areas but aren't physically divided by full walls.

You get the simplicity of scanning individual sections without losing the reality of the final open-concept layout.

5. Add Small Spaces Without Rescanning the Floor

A small closet or irregular section shouldn't require another full scan.

Once the main open space is assembled, the remaining geometry can be adjusted manually. In the example, an additional corner is created, the wall is extended, and a filler room is inserted to represent a small closet, including its door.

This combination of automated capture and manual editing is useful on restoration jobs because real properties rarely match perfect templates.

The floor plan can reflect what the technician actually saw instead of forcing the property into a simplified shape.

1. Scan Complex Open Spaces in Sections

An open-concept room doesn't have to be captured as one enormous scan.

In the example workflow, the connected kitchen and living area are scanned separately first. LiDAR Auto-Scan captures the main elements of each room, with the option to include furniture and appliances.

This makes complicated spaces easier to handle.

Instead of worrying about getting the entire floor perfect at once, focus on capturing one logical section completely, save it, and move to the next.

2. Capture the Space First, Fix Details Second

Real properties aren't clean rectangles.

Walls may be partially hidden. Corners can be difficult to reach. Furniture gets in the way. Staircases interrupt the scan.

That doesn't mean the technician needs to stop and start over.

Once a room has been captured, walls, corners, and other room details can be adjusted afterward. Even dotted lines in the scan don't necessarily mean the room needs to be rescanned.

That changes the field workflow considerably: capture first, refine second.

The technician can keep moving through the property instead of spending extra time trying to make every individual scan perfect.

3. Don't Let Stairs or Awkward Features Stop the Scan

Staircases are a good example of why restoration sketches need to stay editable.

Rather than interrupting the scanning process when you reach the stairs, continue capturing the surrounding area. Once the scan is complete, the staircase can be resized and repositioned directly on the floor plan.

The same principle applies to other objects.

Capture enough information in the field to understand the layout, then make small adjustments where they're needed.

4. Join Separate Scans Into One Open-Concept Floor Plan

Once the kitchen and adjoining space have been scanned, they can be assembled into the open layout that exists in the property.

In the demonstrated workflow, corners are added to the shared wall and the wall section between them is removed. The adjoining wall is then adjusted to align the two areas correctly.

This is particularly useful for properties where spaces function as separate areas but aren't physically divided by full walls.

You get the simplicity of scanning individual sections without losing the reality of the final open-concept layout.

5. Add Small Spaces Without Rescanning the Floor

A small closet or irregular section shouldn't require another full scan.

Once the main open space is assembled, the remaining geometry can be adjusted manually. In the example, an additional corner is created, the wall is extended, and a filler room is inserted to represent a small closet, including its door.

This combination of automated capture and manual editing is useful on restoration jobs because real properties rarely match perfect templates.

The floor plan can reflect what the technician actually saw instead of forcing the property into a simplified shape.

Why LiDAR Floor Plans Matter for Restoration Work

For restoration contractors, creating a floor plan isn't an isolated drafting exercise.

That sketch becomes context for the rest of the job.

It helps the office understand how rooms connect. It gives estimators measurements and spatial context. It provides a place to organize affected areas and other field documentation. And it gives reconstruction a record of the property that was captured while the crew was actually standing in it.

The faster technicians can create that record without sacrificing useful detail, the less information the office has to rebuild later.

Make the Floor Plan Usable, Not Perfect

The best field sketch isn't necessarily the one a technician spent the longest creating.

It's the one the rest of the team can use.

With LiDAR Auto-Scan, complex areas can be captured section by section, adjusted after scanning, and assembled into one floor plan. Stairs can be repositioned, walls corrected, and smaller spaces added without rebuilding the entire sketch.

That means less time fighting with the layout on site and more confidence that the information captured in the field can keep moving with the job.

Scan what you see. Fix what needs fixing. Leave the property with a floor plan the office can work from.

READ MORE: How to Migrate from DocuSketch to magicplan (A Step-by-Step Guide)