


About the integration
This integration is available for Pro users in the US and Canada. It connects magicplan sketches and photos to Xactimate®, allowing restoration and insurance professionals to export property data as ESX files for immediate use in claims estimating.
What it does
Export floor plan sketches from magicplan to Xactimate® as ESX files
Transfer on-site photos directly into the Xactimate® estimating workflow
Provide precise dimensions for calculating material waste, labor, and depreciation
Receive exported files in your inbox within seconds for immediate upload
What's included in the export
Floor plan sketch with precise room dimensions
Windows and doors (note: sub-types are not distinguished; all styles appear the same in Xactimate)
Objects such as furniture, cabinets, and plumbing
Affected areas added to the floor plan
Selected photos and their metadata (captions, source, etc.)
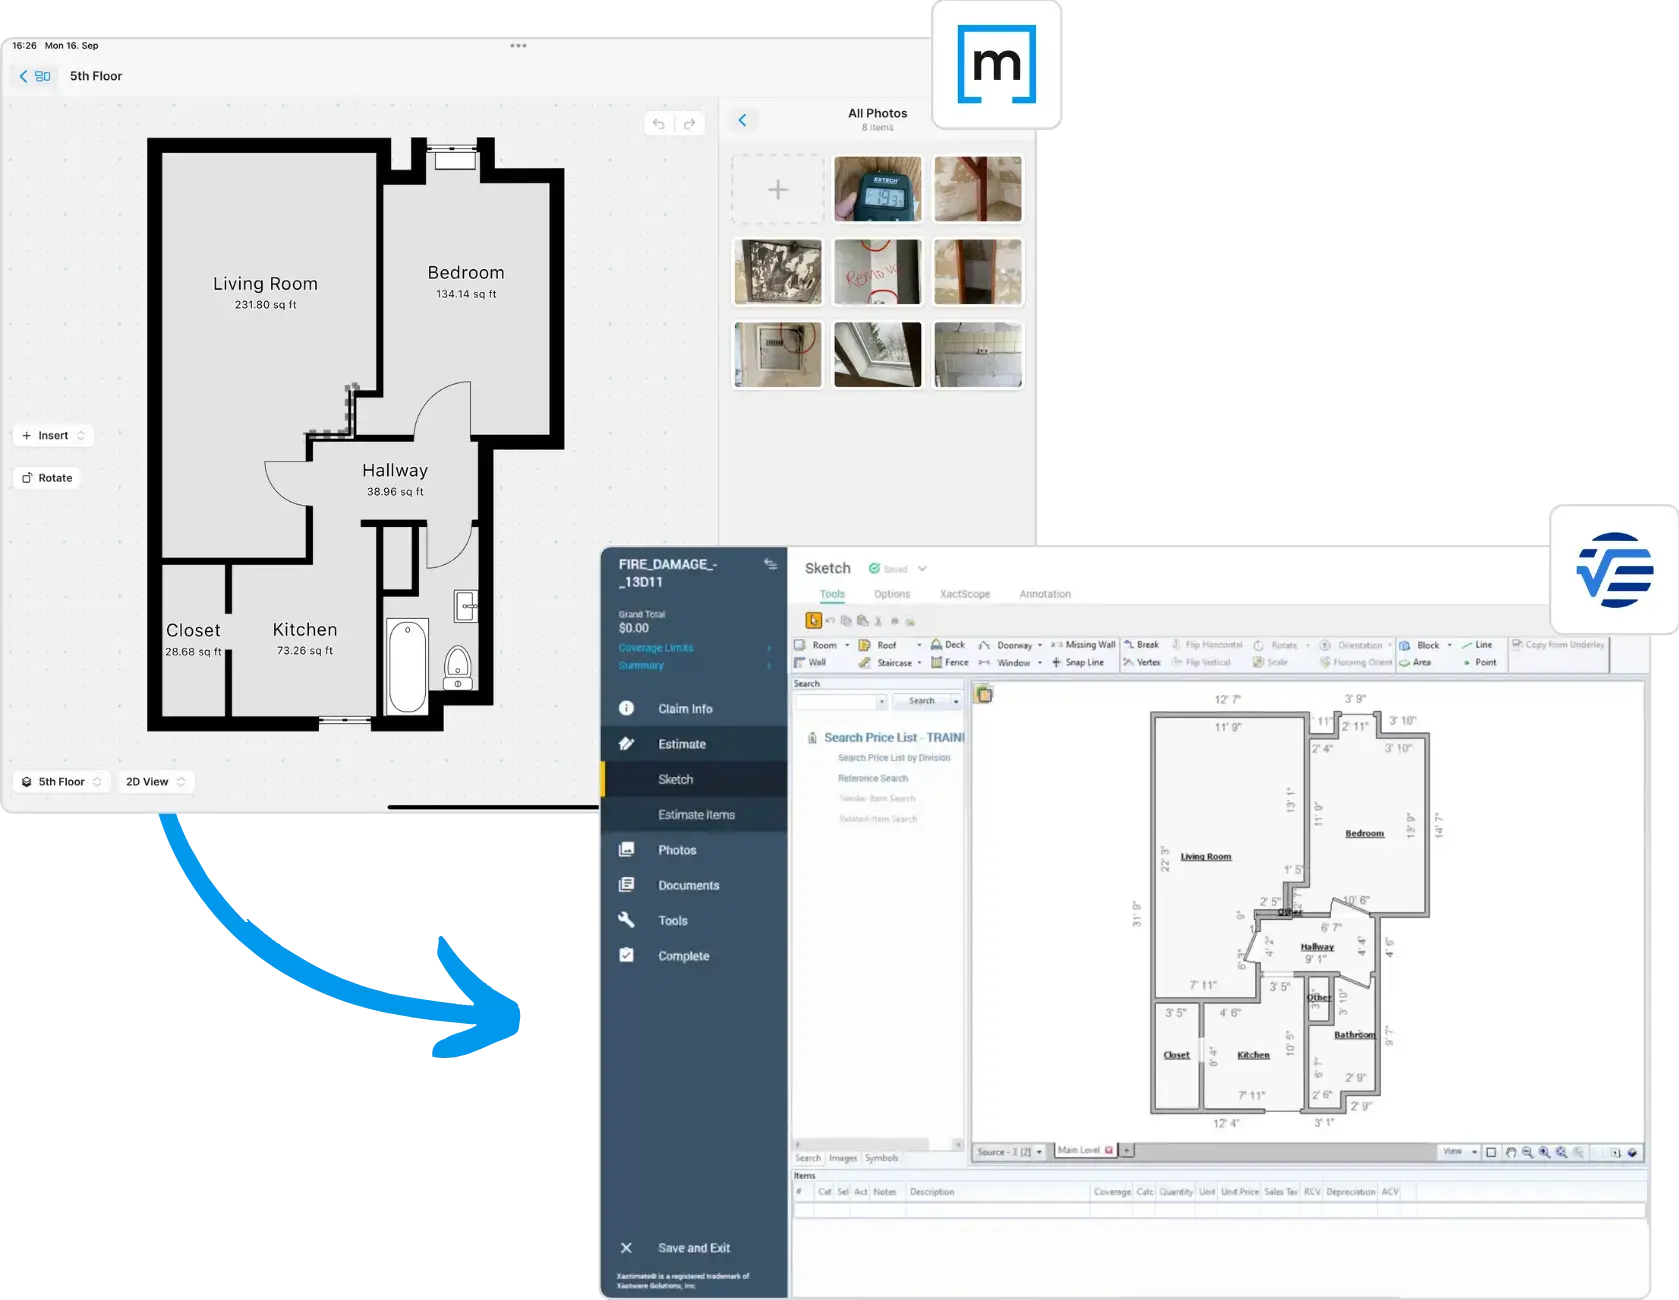
How it works?
Users capture room dimensions and photos using the magicplan app. By selecting the Verisk export option, magicplan generates an ESX file and sends a download link to the user's email address. The file can also be downloaded directly from the magicplan Cloud. This file is then uploaded into Xactimate® to populate the estimate with the floor plan sketch, dimensions, objects, photos, and metadata.
Requirements
Active magicplan PRO subscription. The Xactimate® integration is included with PRO plans.
Active Xactimate® account
Access to the magicplan mobile app or Cloud
This integration is currently available only for users in the United States and Canada.
How to set it up
Open the magicplan app on a mobile device.
Complete a room scan or floor plan sketch.
Tap the export button within the app (under "Files and Sharing") or through the magicplan Cloud (via the project floor level under "Files & Sharing").
Select the "Verisk" or "Xactimate®" export option.
Configure export settings: enable or disable photos, and choose whether to compress photos to reduce file size.
Check your email inbox for the download link to your ESX file, or download it directly from the magicplan Cloud.
Save the ESX file to your computer.
Open Xactimate® (Online or Desktop) and upload the ESX file to your specific claim or project.


