Basement Floor Plan: How to Scan and Document Dark Rooms with LiDAR

Restauration

3 min read

Dark basements are where the difference between a showroom demo and a restoration tool becomes obvious. There may be no working lights. Cell service disappears at the bottom of the stairs. Equipment blocks the walls. Water, fire, or mold damage has changed the room since the last person saw it. The technician is trying to sketch the space, photograph the damage, check the furnace room, and keep the rest of the job moving.

If the field record is incomplete, the problem lands in the office later. The estimator tries to rebuild the basement from dark photos. Someone calls the technician while they are on another loss. A missing wall or measurement sends the crew back. When reconstruction starts, the same basement gets documented again.

The goal is not to make LiDAR look perfect. It is to use the scan for speed, correct anything that is off while you are still standing in the room, and leave with a basement floor plan that someone else can actually use

Does LiDAR work in the dark?

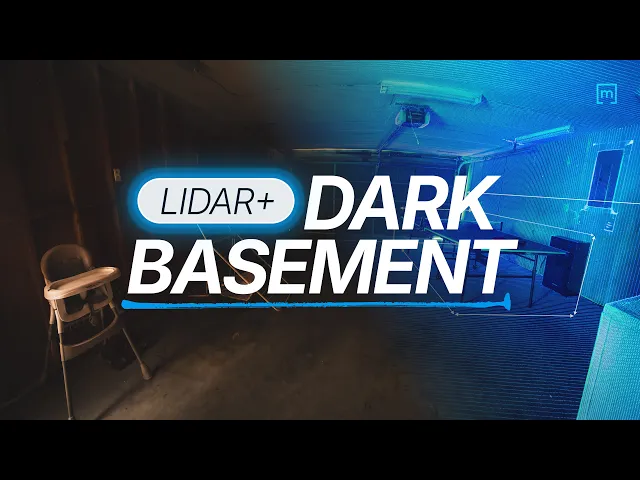
LiDAR measures distance using pulses of light, so it can support room capture in conditions where a standard camera view is limited. However, the complete scanning experience also relies on the device and software recognizing surfaces and room features. In very low light, that recognition may be slower or the app may ask for more light.

In the tutorial test, magicplan captured a basement and a very dark furnace room with only limited ambient light. The app displayed a warning that more light was required, but it still generated the room layout. The finished floor plan then needed a few manual adjustments, including an additional wall, a corrected wall length, a repositioned object, and an extended staircase.

That is the field-first approach to accuracy: scan the room quickly, review the result, and fix it on site. Do not wait for someone at a desk to guess what the scanner missed.

Learn more about how LiDAR scanning works with magicplan and review the current LiDAR and Auto-Scan limitations.

Before scanning a dark basement

Take a minute to prepare before moving through the space.

Put safety ahead of the sketch

Do not enter a basement that has not been assessed as safe. Follow your company’s procedures for electrical hazards, standing water, unstable materials, poor air quality, confined spaces, damaged stairs, and personal protective equipment. A complete floor plan is never more important than the crew’s safety.

Bring a controllable light source

A flashlight, headlamp, or lantern can help the app recognize surfaces and help the technician see hazards. The tutorial intentionally tested LiDAR with very little light, but an actual loss is not the place to make the job harder than necessary. Use enough light to move safely and verify what the device is capturing. Avoid pointing a strong light directly at reflective surfaces when it makes the camera view harder to read.

Prepare the project for no signal

Basements often have weak or nonexistent cellular service. Before going downstairs, make the project available offline. In the current magicplan workflow, favoriting a project stores it for offline access. Changes made offline sync after the device reconnects.

Check the device and camera

Confirm that the device supports the scanning mode you plan to use, that the lens and LiDAR sensor are clean, and that the battery can handle the scan, photos, and video documentation. The available room-scan options depend on the iOS device. See the current guide to scanning a room with an iOS device.

Take a minute to prepare before moving through the space.

Put safety ahead of the sketch

Do not enter a basement that has not been assessed as safe. Follow your company’s procedures for electrical hazards, standing water, unstable materials, poor air quality, confined spaces, damaged stairs, and personal protective equipment. A complete floor plan is never more important than the crew’s safety.

Bring a controllable light source

A flashlight, headlamp, or lantern can help the app recognize surfaces and help the technician see hazards. The tutorial intentionally tested LiDAR with very little light, but an actual loss is not the place to make the job harder than necessary. Use enough light to move safely and verify what the device is capturing. Avoid pointing a strong light directly at reflective surfaces when it makes the camera view harder to read.

Prepare the project for no signal

Basements often have weak or nonexistent cellular service. Before going downstairs, make the project available offline. In the current magicplan workflow, favoriting a project stores it for offline access. Changes made offline sync after the device reconnects.

Check the device and camera

Confirm that the device supports the scanning mode you plan to use, that the lens and LiDAR sensor are clean, and that the battery can handle the scan, photos, and video documentation. The available room-scan options depend on the iOS device. See the current guide to scanning a room with an iOS device.

How to create a basement floor plan in low light

  1. Start where there is some ambient light

    When possible, begin near the stairs, doorway, or another area with enough light for the room boundaries to become clear. Give the scanner a stable starting point before moving into darker sections. In the tutorial, the scan first captured the staircase, wall section, and washing machine before moving into the darker furnace room.

  2. Move slowly and keep surfaces in view

    Low-light recognition may take longer. Move at a controlled pace and give the app time to identify corners, walls, doors, and objects. Avoid fast turns or repeatedly blocking the camera and sensor with your body
    or equipment. If the app asks for more light, pause and add illumination. A few seconds with a flashlight is faster than driving back because the room never closed correctly.

  3. Capture important objects and transitions

    Include the features another person will need to understand the basement:
    • the staircase and its direction
    • the furnace or mechanical room
    • laundry equipment and utilities
    • doorways and partial walls
    • affected walls, floors, and ceilings
    • obstructions that change access or measurements
    The floor plan should show how the rooms connect, not just their approximate square footage.

  4. Finish the scan and generate the floor plan

    Complete the room capture, then generate the floor plan. Review it before leaving the basement. The person standing in the property is in the best position to recognize a missing wall, incorrect length, misplaced object, or incomplete stair opening.

    For current scanning steps, see LiDAR Auto-Scan or Manual-Scan for iOS, depending on the device and job.

  1. Start where there is some ambient light

    When possible, begin near the stairs, doorway, or another area with enough light for the room boundaries to become clear. Give the scanner a stable starting point before moving into darker sections. In the tutorial, the scan first captured the staircase, wall section, and washing machine before moving into the darker furnace room.

  2. Move slowly and keep surfaces in view

    Low-light recognition may take longer. Move at a controlled pace and give the app time to identify corners, walls, doors, and objects. Avoid fast turns or repeatedly blocking the camera and sensor with your body
    or equipment. If the app asks for more light, pause and add illumination. A few seconds with a flashlight is faster than driving back because the room never closed correctly.

  3. Capture important objects and transitions

    Include the features another person will need to understand the basement:
    • the staircase and its direction
    • the furnace or mechanical room
    • laundry equipment and utilities
    • doorways and partial walls
    • affected walls, floors, and ceilings
    • obstructions that change access or measurements
    The floor plan should show how the rooms connect, not just their approximate square footage.

  4. Finish the scan and generate the floor plan

    Complete the room capture, then generate the floor plan. Review it before leaving the basement. The person standing in the property is in the best position to recognize a missing wall, incorrect length, misplaced object, or incomplete stair opening.

    For current scanning steps, see LiDAR Auto-Scan or Manual-Scan for iOS, depending on the device and job.

How to photograph damage in a dark basement

A floor plan shows where the damage is. Photos and video show what it looks like.

Dark, blurry images force the office to guess and give a carrier little useful evidence. Capture the condition clearly enough that someone who never entered the basement can understand it.

Use the camera torch for photos

When taking a photo in magicplan, enable torch mode to illuminate the area before capture. This helps you frame the damage and see whether the image is actually useful.

Use the camera flash for video

Turn on the camera flash when recording video in a dark space. Move slowly, avoid sudden pans, and narrate only what will help the reviewer understand the room, damage, access, or scope.

Tie the image to the room

Do not leave the estimator with a camera roll full of dark basement photos. Add the photo or video to the relevant project, floor, room, wall, or object so its location is clear.

See how to add photos and notes to projects, rooms, walls, and objects. For restoration-specific guidance, read how to assess and document water damage.

The low-light basement check before you leave

Before climbing the stairs, ask:

  • Is the floor plan complete, with all rooms, walls, dimensions, and key spaces accurately represented?

  • Are objects positioned clearly enough to explain the layout?

  • Are wide and close-up photos, plus any necessary videos, clear and linked to the correct locations?

  • Is the project safely stored on the device for offline access?

  • Can estimators and reconstruction crews complete their work without contacting the technician or remeasuring the basement?

This check takes less time than a drive-back. More importantly, it keeps the crew’s knowledge in the file before the conditions change.

What this changes for the restoration team

For the technician: the job is done when you leave

The technician should not have to remember the furnace room layout next week or explain a dark photo from another job site. Scan it, correct it, light the image, and leave the record the way you saw it.

For the estimator: no reconstruction from shadows

The estimator receives connected rooms, reviewed measurements, and visual evidence tied to the basement. The work becomes reviewing and pricing, not guessing whether a dark shape is a wall, appliance, or damaged surface.

For the owner: fewer gaps to catch personally

A repeatable low-light workflow gives every technician the same standard: prepare for offline access, scan, correct, document, and verify. The owner is no longer the only person who notices what the field missed after it is too late.

For mitigation and reconstruction: one basement, one record

The mitigation crew already stood in the basement and understood the loss. The reconstruction team should build on that record instead of starting from a blank page. That protects time, context, and margin on the side of the job where guesswork gets expensive

Work where the job actually is

Restoration does not happen under studio lighting with perfect connectivity. It happens in dark furnace rooms, wet basements, damaged kitchens, and buildings where the signal disappears.

The useful question is not whether a scanner is flawless in those conditions. It is whether the technician can capture the room, see what is missing, correct it before leaving, and attach evidence that holds up later.

magicplan combines floor plan scanning, on-site editing, photos, video, and project documentation so the field record can move into estimating and reconstruction without being rebuilt from memory.

Explore magicplan’s restoration sketch tools or use this 30-minute field guide for scoping a water-damaged site.